Snapchat has been one of the most popular social media apps for quite some time. As you probably know, it’s a photo messaging app where you can send or receive messages in the form of photos, which is very popular.
But the problem is that a message gets deleted automatically after the receiver has viewed it or if it is left unopened for a day.
If you need to revisit a message, can’t recall its contents, or didn’t have the chance to open it, it’s possible. And now that it’s gone, what can you do to recover it?
Some say that there is no way to recover messages that have been deleted. Is this true?
Is it Possible to Recover a Deleted Snapchat Message?
Luck only favors you if you try. Yes, it is possible to recover deleted Snapchat messages. There are several methods that you can try in order to view deleted messages, however, one method may work for you while another may not.
Here in this detailed article about recovering Snapchat messages, we give you a few of the methods you can try to see what works for you.
Method 1: Recover Snapchat Messages on Android From Snapchat Cache
In case you are not aware of what a cache is, it’s a folder in your phone’s memory where recently used data is kept. In the case of Snapchat, its cache stores a lot of useful information along with recently deleted messages.
The app saves these media temporarily with a. nomedia extension so that no other app on your phone can access them. If you are in time, you may be able to access the deleted media again.
To recover Snapchat messages from the Snapchat cache, follow these steps:
Step 1: Open the Snapchat data folder using file explorer. There are a couple of ways to do so. See if your phone has a File Manager app. If so, open it. If not, you will need to download a File Manager app from Google Play Store: there are several file manager apps available for Android devices. You should download the one with the better rating or downloads.
Connect your Android device to your PC via USB cable and enable folder access from your device’s notification panel to explore files and folders.
Step 2: Open the Android phone’s internal storage folder.
Step 3: Once you have opened the Android folder, open the “Data” > “com.snapchat.android.folder”. All the Snapchat files are stored in this folder.
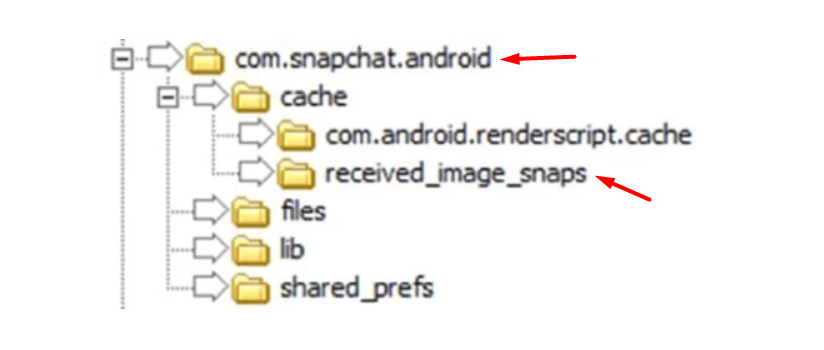
Step 4: Here, you will be able to locate the Snapchat deleted photos and messages with. nomedia extension.
Step 5: Select these Snapchat files and paste them in a separate folder.
Step 6: Now, rename each file by replacing the .nomedia extension with. jpg extension.
Once done, you will be able to see the automatically removed snaps from Snapchat. Open the images to view them.
Note: This is not a foolproof technique to recover deleted Snapchat messages as you will only be able to view the messages that are automatically removed by Snapchat.
If you are unable to recover the Snapchat photos or messages that you were looking for, you can try the next method.
Method 2: Use the Photo Recovery Tool on Android Phone
In this method, you can try to restore the deleted images from your Android by recovering them using an Android App. This recovery tool called Restore Deleted Photos by Dumpster has been developed to recover and restore photos and videos you may have erased knowingly or unknowingly on your Android device. The best thing about this app is that it is absolutely free to use. Here are the steps to follow:
Step 1: Go to Google Play Store; search for Restore Deleted Photos by. Dumpster and install the app on your Android device.
Step 2: After installing the app, grant permission to the app to access files on your device.
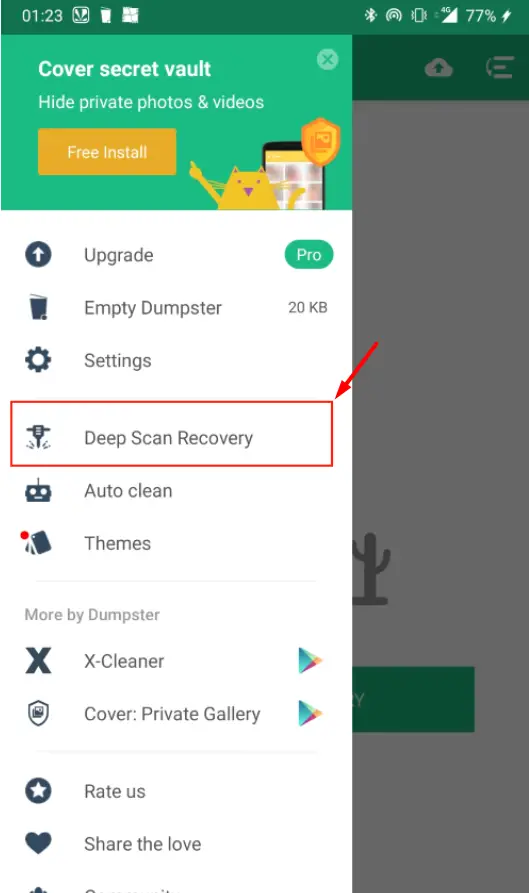
Step 3: Open the app’s menu from the top left corner and click on the Deep Scan Recovery option. The app will begin scanning your device for images and will sort them by date and time.
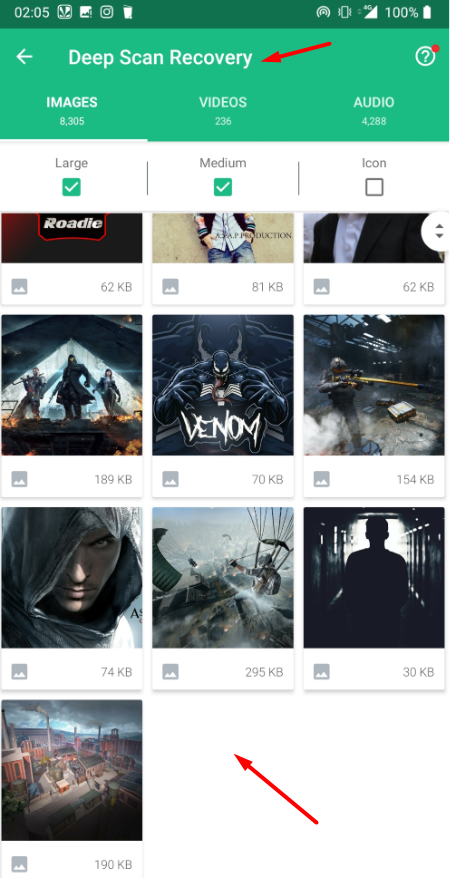
Step 4: Once the scan is complete, go through the files and check if the deleted Snapchat image that you are looking to recover is available. Once you locate the image, select it, and click on the recover button.
This way, you will be able to recover Snapchat messages which you will be able to access and view whenever you wish. It is one of the best options to recover Snapchat messages on Android devices.
Method 3: How to Recover Snapchat Messages on iPhone / iPad / iPod
Let’s take a look at how to recover Snapchat photos or messages on iOS devices. This method works for all devices running on iOS, such as iPhones, iPads, and iPods. It works with the help of third-party software that you will need to install on your PC (works on Windows as well as MAC).
FoneLab’s iPhone Data Recovery app is a software that can recover various files, including images, that may have been accidentally or deliberately deleted from your iOS device.
Below are the steps you need to follow in order to recover deleted Snapchat images or messages on your iPhone, iPad, or iPod:
Step 1: Go to the FoneLab website and download the iPhone Data Recovery software. The software is available for both Windows and MAC; download the appropriate version. Once downloaded, install the software on your PC.
Step 2: Now, run the software and connect your iPhone / iPad / iPod to your PC using the USB cable.
Step 3: Once your device is connected to the PC, it will appear on the software’s interface. Once it appears, go to the left panel and select the top Recover from iOS device option.
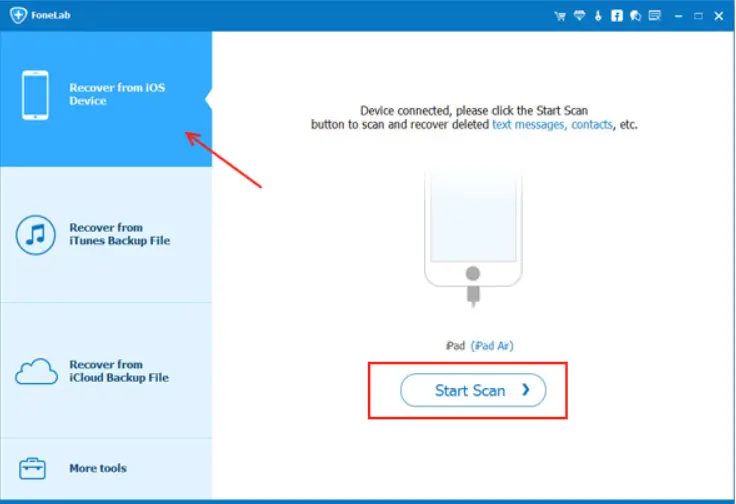
Step 4: Now on the left, you will see your iOS device’s name along with a Start Scan button; click on it to begin the scan. The software will begin looking for deleted files on your iOS device. You can also select the file type you want to scan and recover. Here, as you are looking for deleted Snapchat images, select the image option only.
Step 5: You will begin seeing a list of deleted files on the interface of the software. Scroll down to see if the image(s) that you are looking for is available there. Select a file or multiple files and click on the Recover button to restore images to your iPhone, iPad, or iPod.
Final Thoughts
Here are a few simple methods to recover Snapchat messages on Android and iOS. While it is easy to recover a deleted snap in an Android device, doing the same on iOS can be more difficult. If any of these methods worked for you, please let us know!
